Rickenbacker Truss Rod Adjustment
Adjusting neck relief on a Rickenbacker built before September 1984 can be a source of stress.
The truss rods used before that date have some quirks and can cause a little confusion. Let's take a look at how they work and how they can be adjusted safely.
Early Rickenbacker Truss Rod Operation
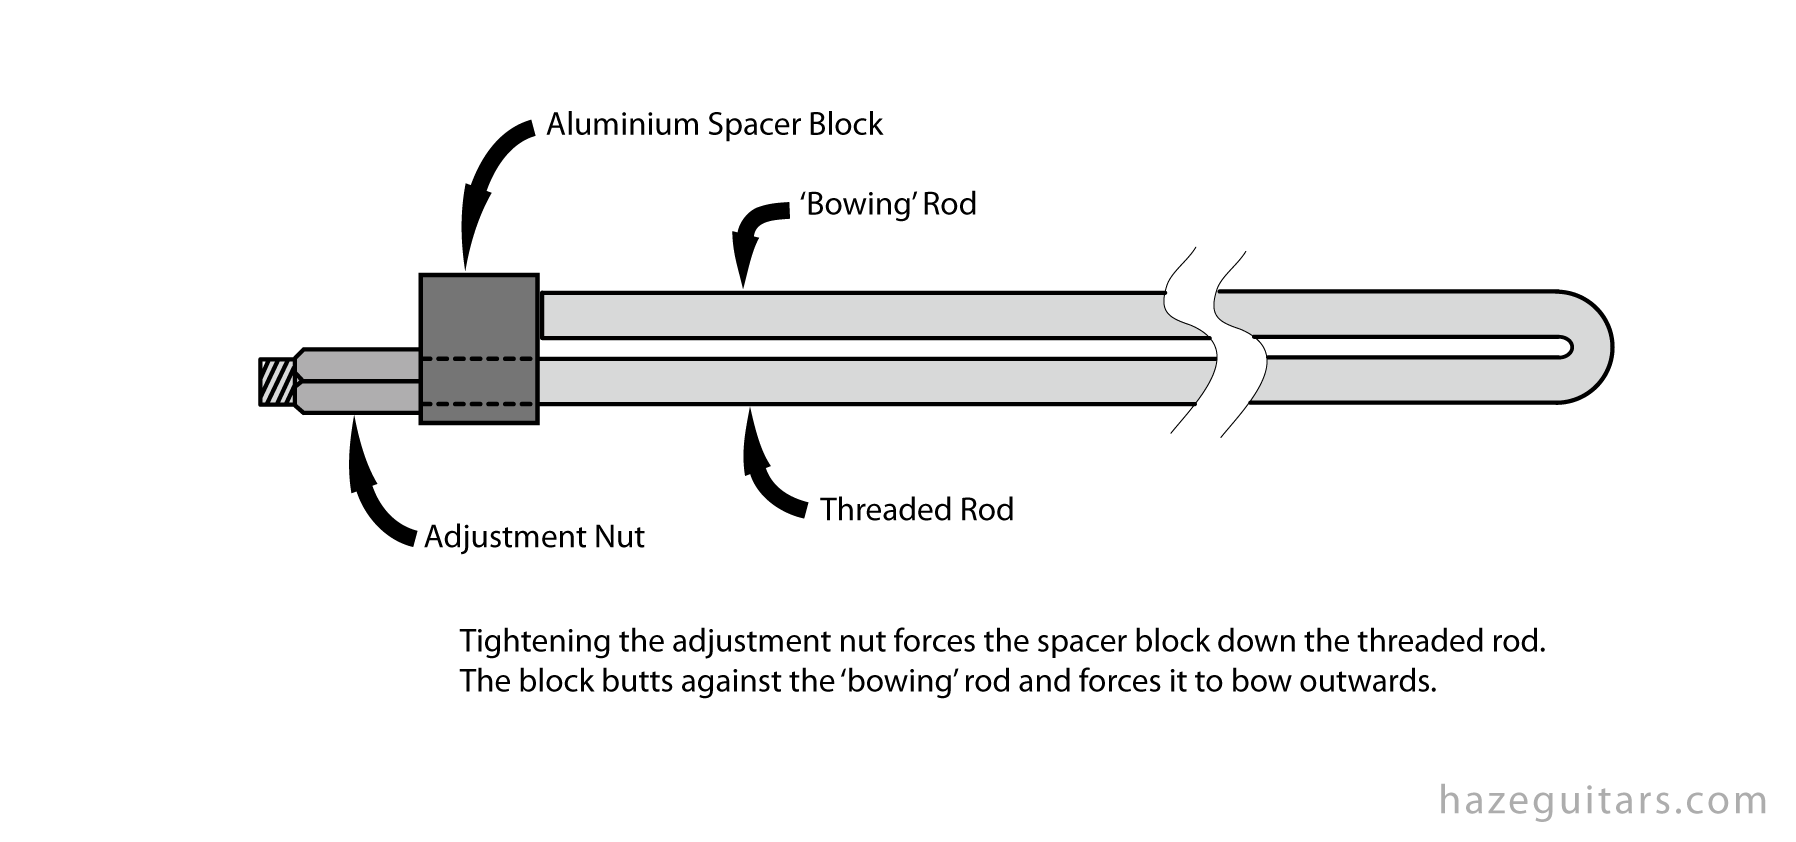
Early Ricky truss rods were made from a single metal bar folded in two, back along its length. At the ‘open’ end, one rod was left just a little longer than the other. This longer bar was threaded for an adjustment nut.
When the adjustment nut is tightened, it forces a metal ‘spacer block’ to push against the shorter bar. The shorter bar, in turn, is forced into a bow. When installed in the neck, that bowing bar can correct for the neck-bow caused by string tension.
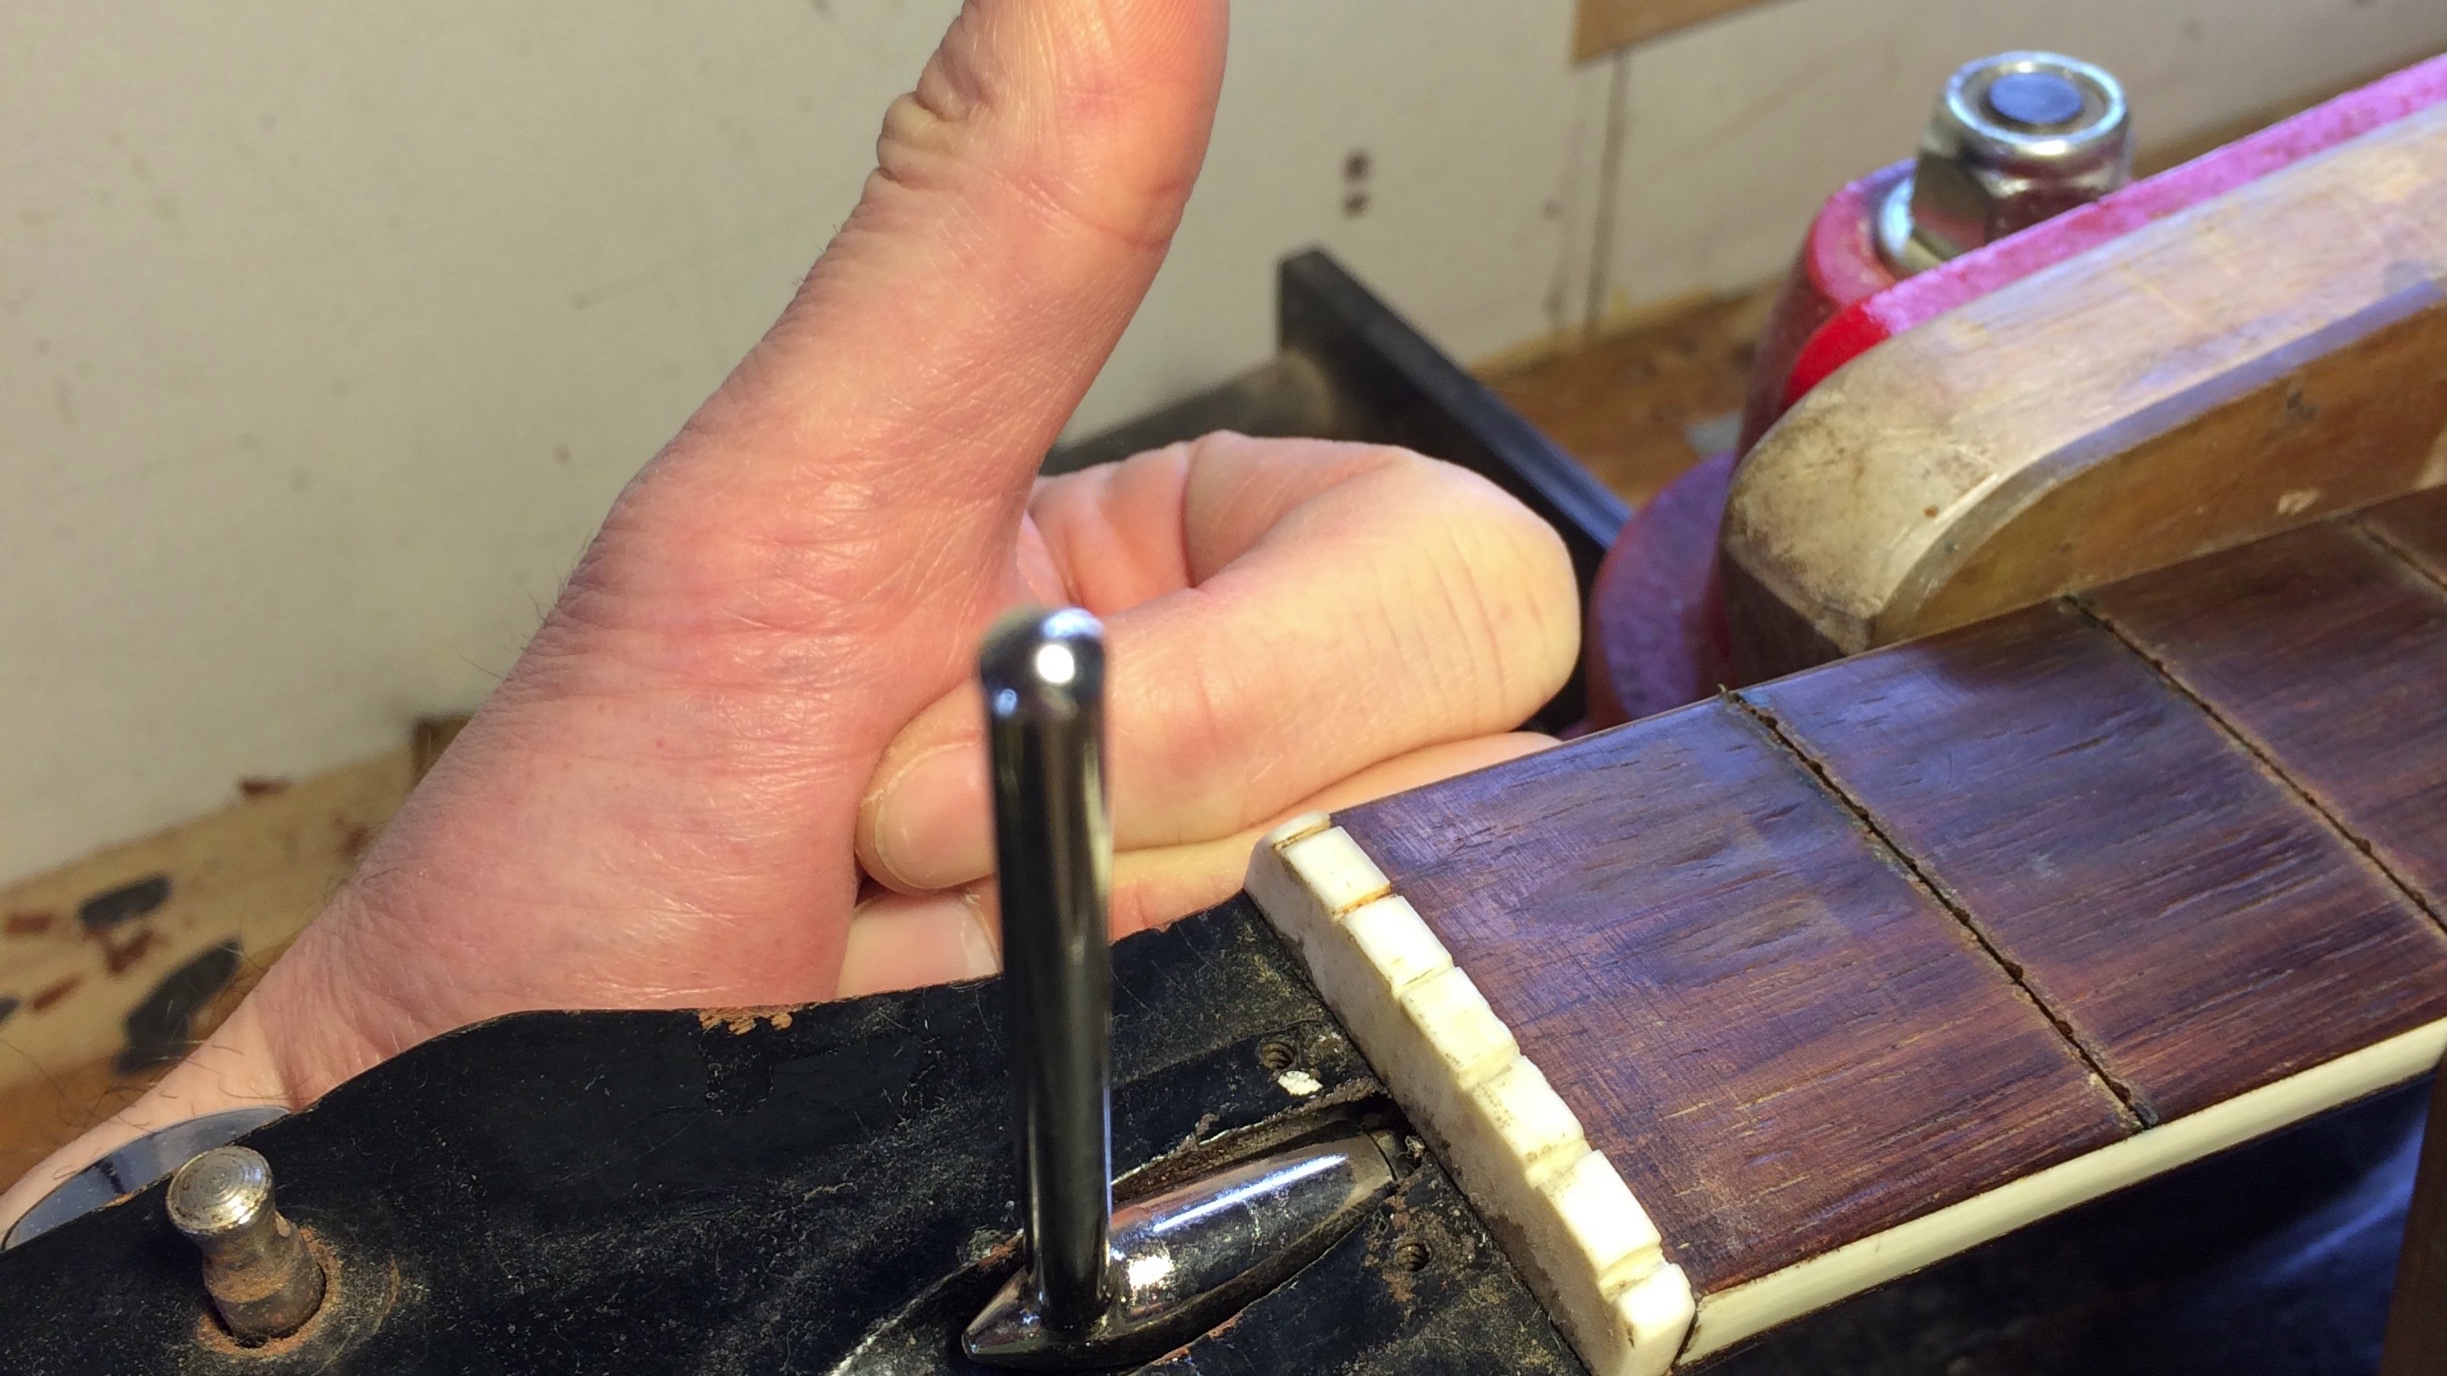
Rickenbacker generally installs two of these rods in each guitar neck. Adjustment is at the headstock end, under that big truss rod cover. You can often identify these rods: Behind the aluminium spacer block, you can see two channels cut in the neck wood. In the gap between the spacer and the start of the fingerboard, you’ll generally see the end of the shorter bar (the one that gets forced out).
Adjusting A Rickenbacker Truss Rod
These rods aren’t the strongest in the world. Don’t try to adjust your Ricky neck like you would a modern instrument. Just tightening those truss rods against string tension is a good way to ruin them or cause the fingerboard to separate from the neck (which, to be fair, it can occasionally do anyway).
You’ve got to ‘help’ your neck into position before you tighten the adjustment nuts on the rods. While not strong enough to actually move the neck into position, the rods can usually hold it there once you do the hard work for them.
To safely adjust your Rickenbacker neck:
- Place a towel on a sturdy table or worktop and lie your guitar or bass on this with its neck extending off the edge. Obviously, be careful that it doesn’t topple off.
- Have a friend hold the body firmly to the table while you pull down (carefully) on the headstock. What you’re doing is manually pulling the neck into a slight back-bow. Watch the strings move towards the frets as you pull down. Don’t go crazy—you don’t want a broken neck.
- Keeping the pressure on the headstock, use your other hand to tighten the truss rod nuts. Just snug them up—don’t over tighten.
- Check your tuning and see how your neck looks and plays. It might be necessary to repeat these steps if you haven’t gotten all the way to where you want it. That’s ok—taking it slowly is best.
Dual Truss Rods
Yep, most Rickenbackers will have two rods in the neck. Each rod can be adjusted individually. The claim is that you can set a slightly different relief for the bass and treble sides (to give a little more relief for the wound strings, for instance). If you can make this work reliably and repeatably, good for you. I'd advise you to equalise the tension and set the rods so bass and treble relief is the same.
Newer Rickenbackers
After ’84, Rickys have come with a more traditional truss rod installed. These are more sturdy and can generally be adjusted under tension the same as most modern instruments. These rods can usually be identified by a thinner, steel spacer—more akin to a long ’washer’—in place of the aluminium block of old, and by the fact that the rod ‘channel’, and therefore the rod itself, isn’t visible in the neck wood.